Selection, splitting and staggering.
Step two
Straightening
Step threeBasic Beveling

m
 m fly rods
Heat treating
Step five Hand planing 1
Hand planing 2
Step sixHand planing 2
Gluing
Step sevenFinal dimensions
Step eightAttaching hardware
Step nineWrapping
Step tenFinish
Step eleven
Rod sock and tubeShipping and
Customer care.
home
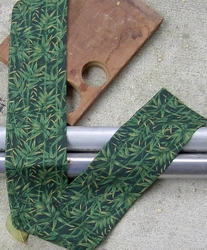
I had a hard time finding a person who could make a good rod sock. Eventually, I ask a friend of my wife, Carol Ryan, if she'd make one or two for me and the results were more than satisfactory. I now use her for all my rod socks. I supply her with two different cotton cloths. One is a molted green and the other (at right) is a bamboo print.
 I
also did a search for an inexpensive, yet attractive, rod tube. I
decided to make my own. The biggest problem was an acceptable
material for the tube. Most of the aluminum that I found was so
heavy that I might as well have been using steel!
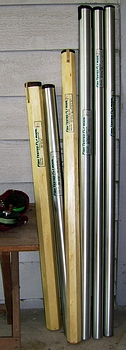
I
also did a search for an inexpensive, yet attractive, rod tube. I
decided to make my own. The biggest problem was an acceptable
material for the tube. Most of the aluminum that I found was so
heavy that I might as well have been using steel!Eventually, I came across a source for 6061-T6 which is an aircraft grade aluminum. I could get wall thickness down to .035." The rest was trial and error. I'm fairly pleased with the process. My standard rod tube is the aluminum tube with a wood plug in the butt end. That end is fiberglassed for waterproofing. a rubber seat is placed in the bottom of the tube to cushion the rod. Then the tube is cut to size.
The end caps are made of teak and are held in place by a rubber gasket. The gasket doubles as a seal. I originally used Velcro straps but have found them to be more trouble than they're worth. The rubber gasket is secure by itself.
The only thing that's left is to buff the tube to a luster.
I also make a hex rod tube. It's popular with some people and I offer it as an upgrade. I use a fairly light color wood with dark ends. I think it looks fairly nice.
Over time I've reduced the diameter of my rod tubes. A standard two piece rod tube is now 1 1/2" in diameter.